
Today we’re going to look at how to build our own simple DIY insect hotel using only free items found around your garage and garden – a fun little project to work on with input from children at home or at school.
This will also be a great opportunity to talk to your children about beneficial insects, and their importance to the ecosystem – and in a very tangible way they’ll be helping these little critters to help us.
In my case I have an old discarded wooden mailbox that I want to use as the starting point for this little project, but I’m sure most of you can find something to use – some ideas on what to use for your insect hotel structure are:
- Small wooden drawer
- Wooden mailbox
- Wood offcuts
- Wooden cubby
Alright so let’s look at what an Insect Hotel is, and what we need to think about when making our own one…
What is an Insect Hotel?
Insect Hotels (also known as bug houses, bee houses and numerous other names) are essentially a cozy place for beneficial insects to shelter in your garden.
These can be built as simple DIY projects or purchased in complete or kit form, and if well designed and constructed can serve as a wonderful functional (and educational) addition to your garden.
Why would I want a Bug House in my garden?
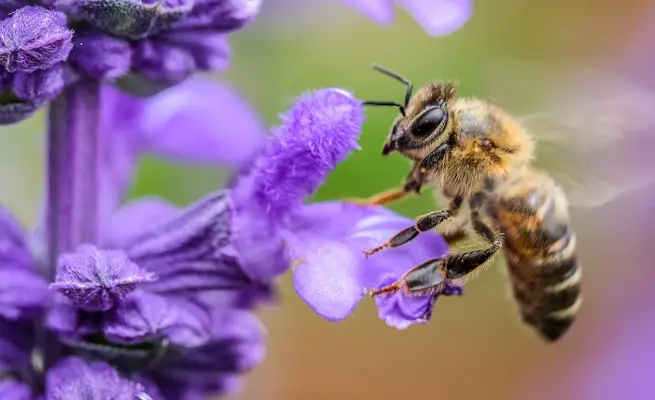
It has long been understood that beneficial insects such as bees and ladybirds are essential to the ecosystem – and your humble suburban garden is no exception.
As suburban sprawl and highly manicured gardens have gradually taken over forests, grasslands, and other diverse natural habitats, this has contributed to a decline in beneficial insect numbers.
While much of this can be attributed to the increasing usage of pesticides and other sprays across most countries, a loss of suitable homes for these insects is also a major factor – in large part due to the previously mentioned highly manicured suburban garden (or indeed urban concrete expanses).
Adding a bug house to your garden means that insects such as solitary native bees have a suitable home right amongst your plants and flowers.
Should this really just be called a Bee House?
While bees are one of the most well known beneficial insects, they are by no means the only one.
Ideally we would like our gardens to be rich with diverse life, as a well balanced ecological system is always a good idea.
In addition to solitary native bees which need dry nesting holes to shelter in and to lay their young, it can also be a good idea to attract and support other insects such as ladybugs which eat many types of pest insects, that would otherwise damage our gardens (or require pesticides and other chemicals to deal with).
So what is an insect hotel made up of?
We need to firstly find or make a relatively sturdy wooden structure that won’t collapse or move around too much in the wind.
It will also need to have a roof to it that will shed the majority of rain water.
What we are going for here is a comfortable dry secure structure, which we can then fill with suitable nesting materials for a variety of insects.
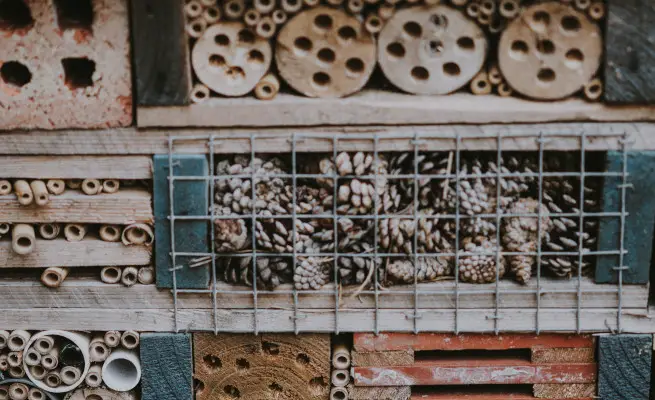
There are many options for nesting materials – which will suit different types of insects, and different species of each:
- Hollow bamboo stalks
- Cut branches with holes drilled into them
- Pieces of wood with holes drilled in them.
- Bundles of sticks
Keep in mind that what we are trying to achieve is a stable dry location, filled with suitable organic materials that won’t be disturbed for long periods of time, and providing some protection from birds and other wildlife which might otherwise uproot and happily eat our little insect friends.
What is the best location for my insect house?
There are many good options for where to place your insect hotel, and in many cases having somewhere sheltered to nest is better than nowhere.
Keep in mind that different types of beneficial insects prefer different environments.
For example while bees like to be warm and dry, some other insects prefer moist decaying organic matter.
Usually it would be best to make these as separate bug houses, so you’re not trying to create two very different environments in one place.
Here are some things to think about:
- Should be somewhat protected from heavy rain
- Should be sheltered from the wind
- The amount of sun it gets is important depending on the species.
- Allow it to drain, so the contents don’t go mouldy.
- Usually would be elevated off the ground, depending on whether ground dwelling or flying species are being targeted.
- Some protection from predators (eg birds)
Should I make a DIY Bug Hotel or buy one from a store?
There are numerous bug hotels available to buy, either in kit form or pre-built, and these could be an option if you’re not interested in making your own DIY bug house, or if you don’t have the tools or materials needed.
Do keep in mind that we want to avoid plastics and chemically treated wood, as these toxic and potetnially non- breathable materials are not well suited to a healthy thriving insect ecosystem.
Ideally we want our insect house to have an interior that is full of natural organic materials, free from chemicals, perfect for our beneficial insect allies to make their home.
Likewise whether building or buying our insect hotel we also need to think about the layout and design, and whether it is suitable for the insects we wish to attract and support.
For example, while it might look pretty to have cubby holes packed with dried flowers, these would be of little use to our solitary native bee friends, who are looking for holes to nest in, and who would much prefer hollow bamboo stalks or untreated wood with holes drilled into it for this reason.
Some of the cheap mass produced bug hotels are made without taking any of this into consideration, and are unlikely to offer any real benefit to the insects we are aiming to attract to our gardens – but there are certainly some decent options around.
Are all insect hotels good homes for beneficial insects?
No, they’re not. If it is too damp for example, and becomes full of mold and other bacteria or fungi, this is likely to do more damage than good.
In fact, beyond even how habitable the insect hotel is to its inhabitants, if it becomes a hotbed of parasitic predators through disease and overcrowding, it could actually contribute to the decline of the existing population of beneficial insects in your garden!
It’s for this reason that most expert entomologists recommend not building large towering structures to use as insect hotels, as due to concentrating the beneficial insect population, and likely never getting cleaned out for years at a time, they can become a prime target for parasites to infest the whole population of insects.
Instead, think about creating 2 or 3 different smaller distinct insect hotels, each one targeting a specific type of beneficial insect – and as a result not concentrating large numbers in a single location.
This will also more easily support periodic cleaning out of old disused nesting sites, to prevent disease and parasitic infestation.
How to build a DIY Insect Hotel (for free!)
Step 1 – Decide which beneficial insects
Obviously the specific insects can vary a great deal depending on the region or country you’re in, but common examples would be targeting solitary native bees, which love to nest in hollow bamboo or holes in wood.
Step 2 – Gather materials
I had a hunt around my property (and a forested area of a nearby park) and found a variety of things I thought would be useful in building a quick and easy insect hotel :
- Discarded wooden mailbox
- Unused piece of wooden trim
- Large old offcut of hardwood railway sleeper
- Some small to medium fallen tree branches
- Wood screws
- Woodworking glue
- Metal brackets
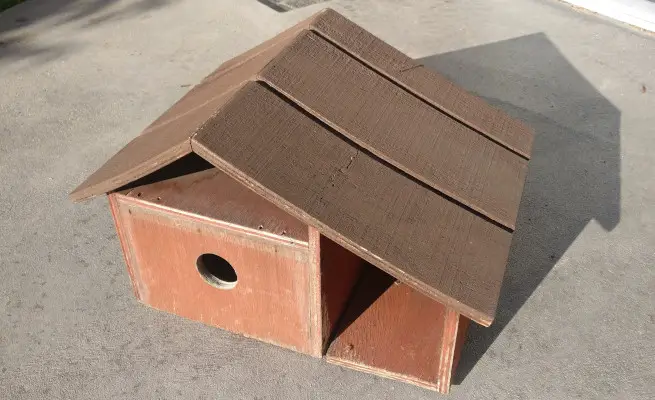
I planned to make a few modifications to the wooden mailbox, so that one side was open, and all other sides were sealed. This would allow me to pack it full of cut branches with holes drilled in the ends of them.
Step 3 – Gather tools
This will vary greatly depending on what materials you are working with – if you are needing to buid a fancy insect house you may need more tools, but for building a simple box with a sloped roof you’d likely only need the same set of tools as I needed to make my modifications to the mailbox, which were:
- A handsaw
- A cordless drill
- Drill bits
- Screw driver bits
- Sandpaper
- Measuring tape
- Hammer & nails
Step 3 – The Structure
First I needed to knock a couple of pieces out of the mailbox and attach them to the other side of it, to form the basis of the structure.
I cut pieces of the wooden trim and glued them into the spaces I had left, to help seal up the back of the box.
The mailbox needed some serious strengthening at this point, as so many structural pieces had been moved around.
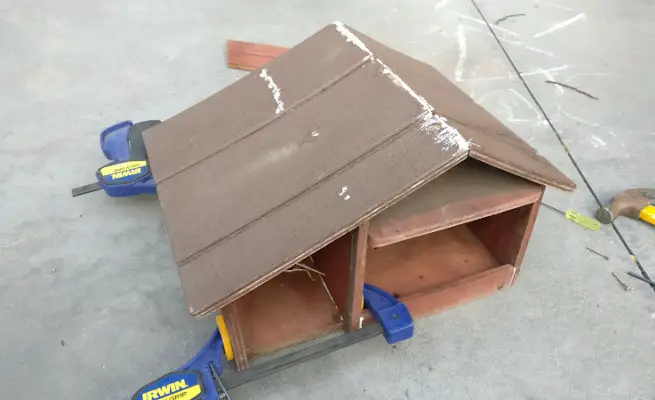
I drilled a few pilot holes, and added some wood screws, and the box is much stronger all of a sudden – it’ll easily handle the combined weight of all the sawn branches that will be going into it, and be able to withstand all that mother nature is likely to throw at it in a suburban garden!
I also used non-toxic woodworking glue to fill all airgaps and old screw holes in the outside wood of the structure, so it will be fully waterproof and windproof from all sides other than the front.
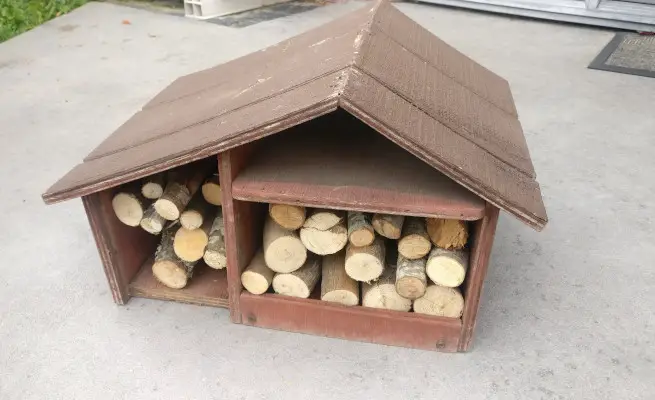
Step 4 – The Filling
With my DIY insect hotel I’m wanting to support native bees primarily, and anything else will be a bonus.
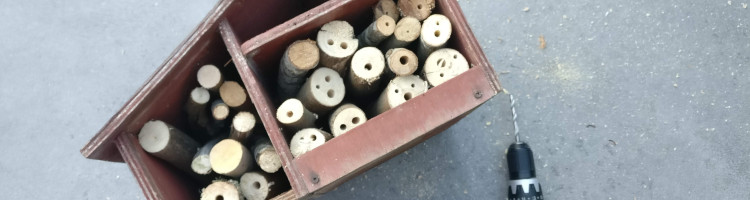
First I measured the depth of the mailbox structure, and cut the branches I’d found to be a little recessed from the front, to help ensure they stay as dry as possible.
I placed the cut lengths of branches into the box, until I had enough cut to fill almost all of the space.
Step 5 – Make plenty of cosy nesting holes
Next I took all the branches out and drilled a holes into the ends of them, making sure to slightly angle the holes up, so that they aren’t likely to collect any rainwater that hits the end of the branches.
The holes were a range of sizes, between 3mm (1/8″) and 10mm (1/2″), and as deep as the drill bits could reach into the wood.
Some narrower branches just had room for a single hole to be drilled, whereas some of the larger branches could accommodate several drilled holes.
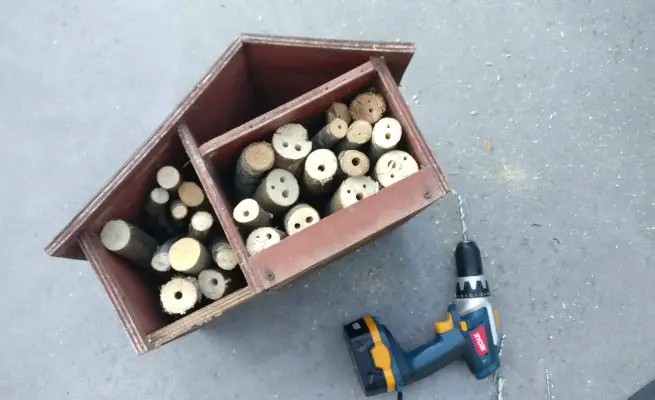
I then lightly sanded the edges of the holes so that there were not any sharp splinters to make access difficult for an insect with delicate wings.
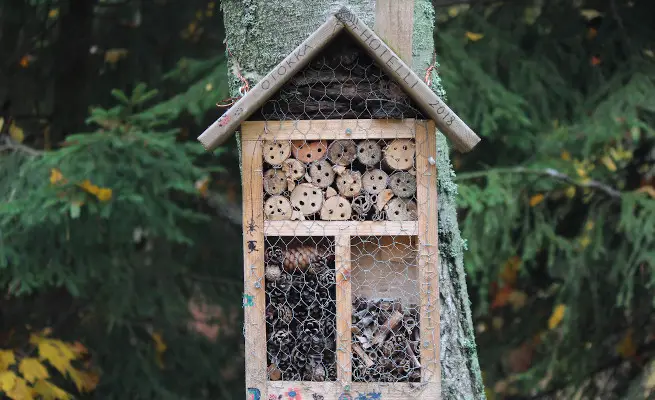
Step 6 – Install it into your garden
Lastly I just needed to find a suitable place for the insect hotel to be attached in our garden.
I chose to install it in this sunny spot amongst the branches of a small tree against our fence.
It should be reasonably sheltered from wind and rain here, and get decent amounts of sunlight to keep it dry and free of damp and mold.
To elevate the insect house I just attached the large offcut of railway sleeper we had left over from making a garden bed years ago.
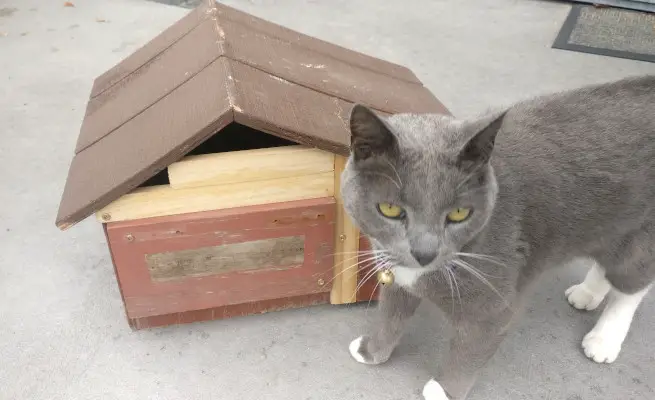
This meant I could stand it up against the fence at a set height, and with another bracket attach the insect hotel to the fencepost so it remains in place regardless of what leaping cats and curious toddlers have in mind!