
Preschoolers just love to let their curiosity get the better of them, as any parent can attest to!
Their relentless exploration of their environment does actually play a big part in brain development in a multitude of ways – from problem solving and imagination, to fine motor skills, and everything in between.
I know our little toddler is no exception, and she’s forever roaming the house fiddling with latches, jiggling door knobs, pressing buttons, and more around our house.
So, let’s embrace that, and use the very same instinct for good 🙂
We can attach a whole bunch of items onto a wooden board for her to play with any time – and without danger of breaking anything around our home!
Today we’re going to build a DIY busy board (also known as an activity board, sensory board, Montessori board and many other names it turns out!), using only free bits and pieces I can find around the house.
Total cost? $0.
Now that is what I would call rare when it comes to must-have toddler items. 🙂
So, let’s get started…
What materials do you need to make a busy board?
That all depends on what we can find laying around the house and garage.
Firstly, you’ll need:
- A board. (I found an old offcut of laminated MDF board in the garage)
Next, you need to find some items for your toddler to interact with.
Here are some ideas to get you started (I actually used many of these as you’ll see shortly):
- Padlocks
- Latches
- Hinges
- Light switches
- Bells
- Buttons
- Gate latch
- Wheels & Castors
- Length of bicycle chain
- Bicycle bell
- Carabiners
- Door latch bolt
- Door handle
And remember, it doesn’t have to be items found in your garage – you can use all sorts of things found inside your home too:
- Zips
- Pieces of interesting cloth / fabric
- Calculator
- An old phone
- Keyring
What tools will you need to make the best activity board ever?
This will all depend on what you’ve found around your home to make your activity board with!
If you have a bunch of items you’ve found in your garage, like door latches and light switches you’ll need basic tools to attach items to the surface of the board, like the following:
- Screwdriver (I used a Phillips head screwdriver)
- Wood screws (various lengths – careful, not too long or they’ll poke out the other side of the board – but they do need to be very secure.)
- Sandpaper
If you plan to recess anything through the board, you’ll probably need to gather up a couple of more serious DIY tools to add to the above! I used the following:
- Power drill (I prefer to use a cordless power drill)
- Drill bits (assorted thickness – I used everything from 1.5mm (1/16″) through to 10mm (27/64″) drill bits)
- Holesaw bits / Forstner bits (if you need to cut a decent sized hole through the board, larger than the drill bits you’re using)
- Jigsaw (to cut square holes in the board etc)
- Handsaw (or circular/benchtop saw, to be used for cutting boards to desired size)
- Safety equipment (power tools don’t always play nice folks!) – think things like safety glasses, earmuffs, dust mask etc. You don’t want to end up frightening your beloved little toddler with your nasty injury!
Here are the household items I found to use on this project
First of all I headed to the garage, and made a bee-line for my shelves of miscellaneous junk accumulated over many years of living in our house.
As I hoped, it made for ripe pickings too, due to many assorted DIY projects, and the years of fixing things and making minor changes around the property.
Regardless your situation though, any home should have a handful of items scattered throughout that can be found and allowed to take on greater purpose through this new entertaining and educational station for your child!
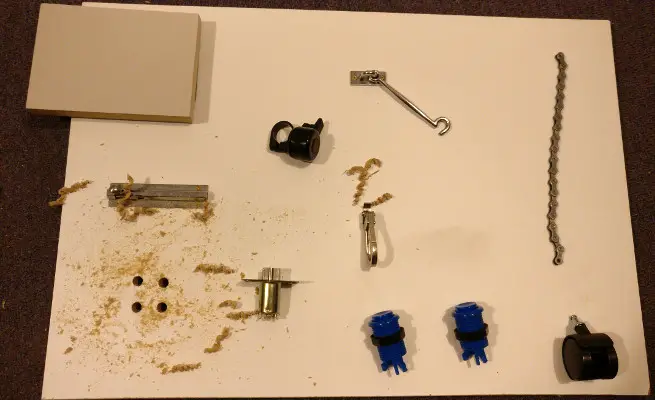
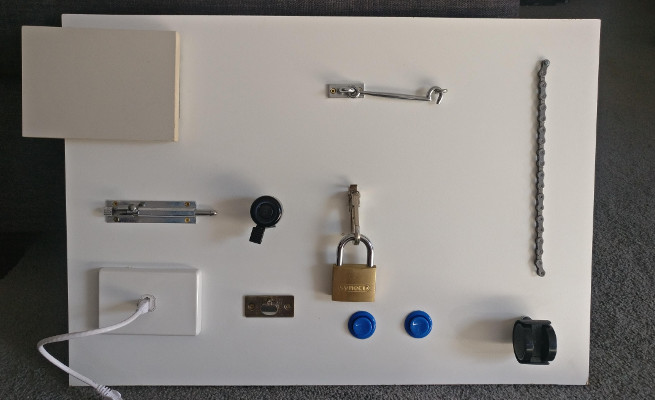
I found the following things to use to make my busy board:
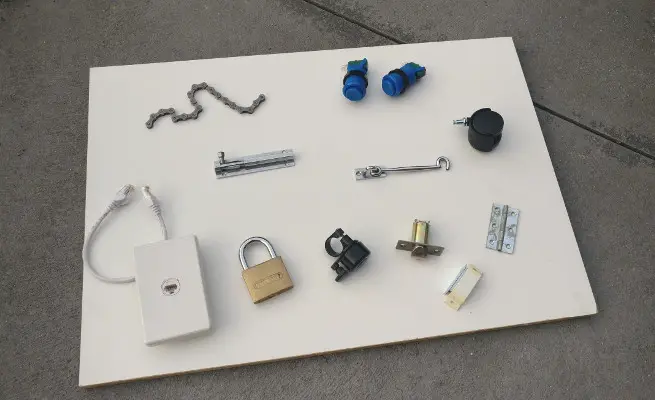
- A white melamine laminated MDF board. (610mm x 420mm / 24″ x 16.5″ – this was the biggest board offcut I could find in the garage). It is very hardwearing material, and should be reasonably spill-proof and cleanable.
- A short length of bicycle chain (broken off an old used chain, which I hadn’t thrown away for some reason).
- 2 x arcade machine buttons (spares from when I built an arcade machine some years back as a much bigger DIY project!)
- A sliding door latch
- A free rotating castor wheel
- A hinge
- A magnetic cupboard door catch
- A bike bell
- A padlock
- A door latch bolt
- A spring-loaded carabiner
- An Ethernet jackpoint and short patch cable.
What activity board layout should you use?
This is going to depend greatly on what items you end up with.
Here’s what I did…
I took the board and laid it flat on the garage floor, and started arranging the items on it to see how much space I had to work with.
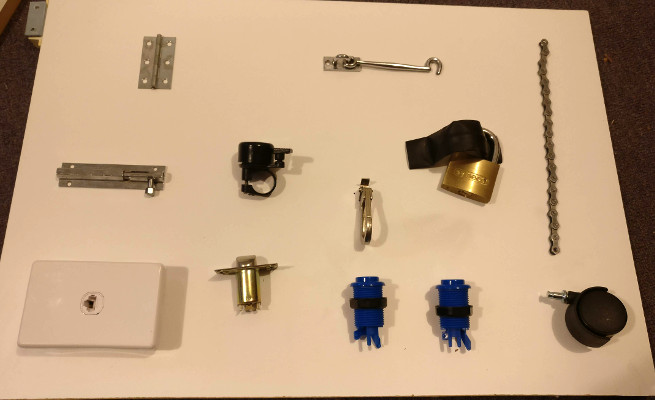
You’ll want to consider which way up the board will be placed, and whether each movable item has enough space to move around without colliding with other features.
I shuffled items around, and quickly decided that the magnetic latch in the top left corner I would turn into a little door held shut by the magnet – which I could hide a funny sticker underneath.
My layout requirements were pretty simple – I just wanted to use all the gadgets I’d found, and for our toddler to have enough space to be able to enjoy each function in its own way, wriggling or coiling the bike chain, or placing a latch on and off for example.
Surprisingly, my completed busy board actually follows this initial rough layout fairly closely as you’ll see in a moment.
The busy board build begins…
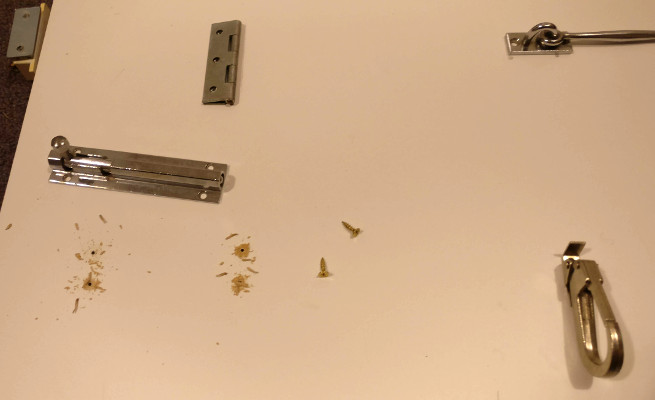
I started by marking out in pencil where all the screws to fasten each item would be located.
This was followed by drilling narrow pilot holes for the screws and fastening the items one by one.
These have to be fastened securely – most toddlers are going to repeatedly wrench on these things as hard as they can over the years, and the last thing we want is for them to pull a metal object and/or screws out of the board.
Next I found a small grey MDF board offcut, and sawed off one end to use as a little door. To attach the door I used the hinge.
I screwed the magnetic door catch to the side of the main activity board, and the small metal plate to the back of the door. With those two in place, the door now clacks shut and is secured in place by the magnetic catch.
I also stuck on a couple of adhesive rubber feet to make closing the door quieter.
The next thing I wanted to install was the Ethernet jackpoint. As this protrudes out of the back of the unit, I needed to cut a rough square in the board to allow the faceplate to sit flush with the surface.
To do this, I used my go-to quick and dirty method – adding four large drill holes, and using the jigsaw to cut in between them.
This would let me attach the Ethernet jackpoint with a couple of narrow pilot holes allowing screws to be secured into the board.
I’m sure this could equally be used for attaching a light switch or similar. (Though I wouldn’t recommend adding any kind of power switch or power outlet – I’d never want to encourage play around those type of household items, even in this safe context.)
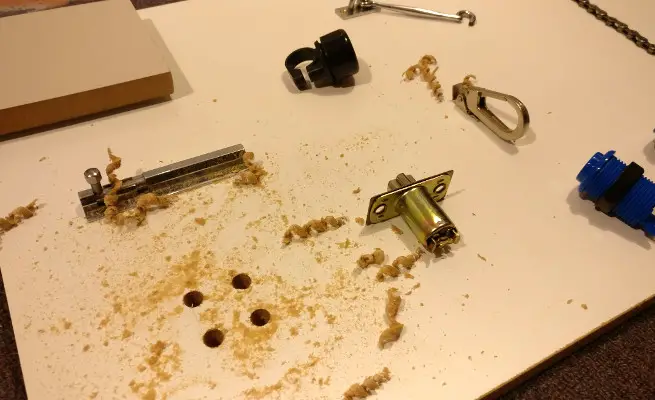
Before I attached any further items, I used a holesaw attachment on my drill to cut 3 holes in the board along the bottom – two for the arcade buttons, and the third for the door latch barrel.

Now I could secure the remaining items using screws (and in the case of the bicycle chain, drilling a hole through ther board and securing it in place with a nut and bolt that could fit through a chain link hole).
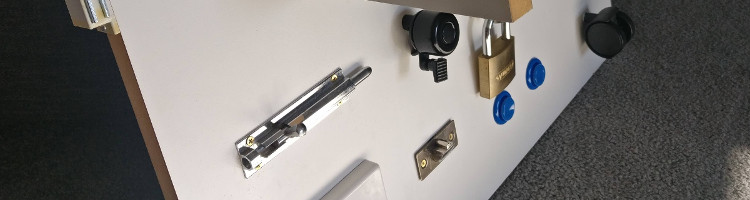
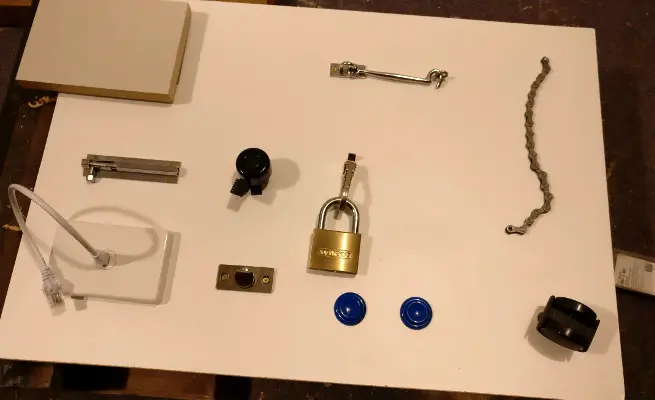
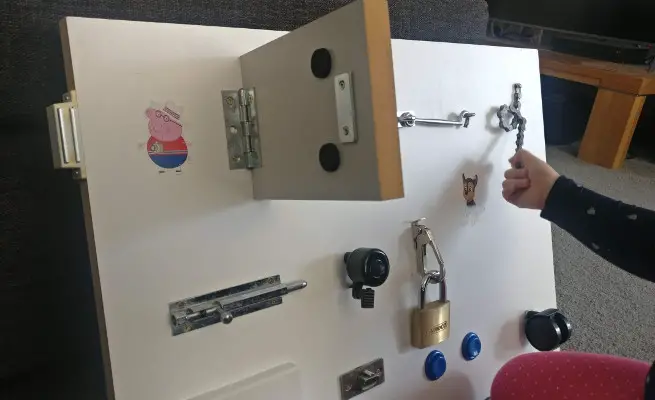
And here it is, in all it’s glory.
So, was making a DIY busy board for our toddler worth all the effort?
It is early days yet… but already I can say a resounding “YES!”
As soon as I walked in holding the board for her, saying I’d made her something to play with, her little eyes widened and she immediately started investigating how everything on it worked – squealing with delight at with each new discovery.
The addition of a couple of stickers of her fav cartoon characters Peppa Pig and Paw Patrol definitely sealed the deal for her.
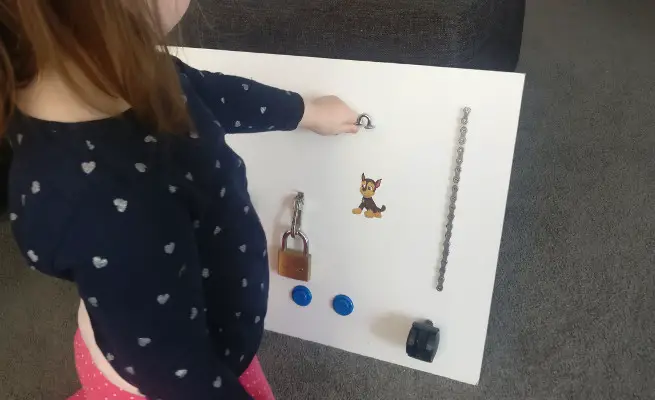
Upon opening the door (held VERY firm for a toddler by the magnetic catch), she was delighted to find Daddy Pig smiling back at her!
It’s not going to win any awards for design, but it’s target audience of one little toddler loves it just the same.
(I just hope I’m not going to regret including an Ethernet jackpoint, and inadvertently cause future home network disruptions once she figures out how to remove the cable!)