

Helping our students, particularly young children, plan an outline of the story they’re setting out to write is an extremely useful technique.
This helps them to consider different narrative elements such as characters, settings, and their overall story arc.
Today we’ve put together a couple of handy worksheet PDFs for you to download and use with your class – and we will go through some our tips for how best to introduce your students to a story planner.
How to use these:
These worksheets can be used by many primary / elementary age groups, and we just need to adjust how much additional explanation or scaffolding we provide the younger students.
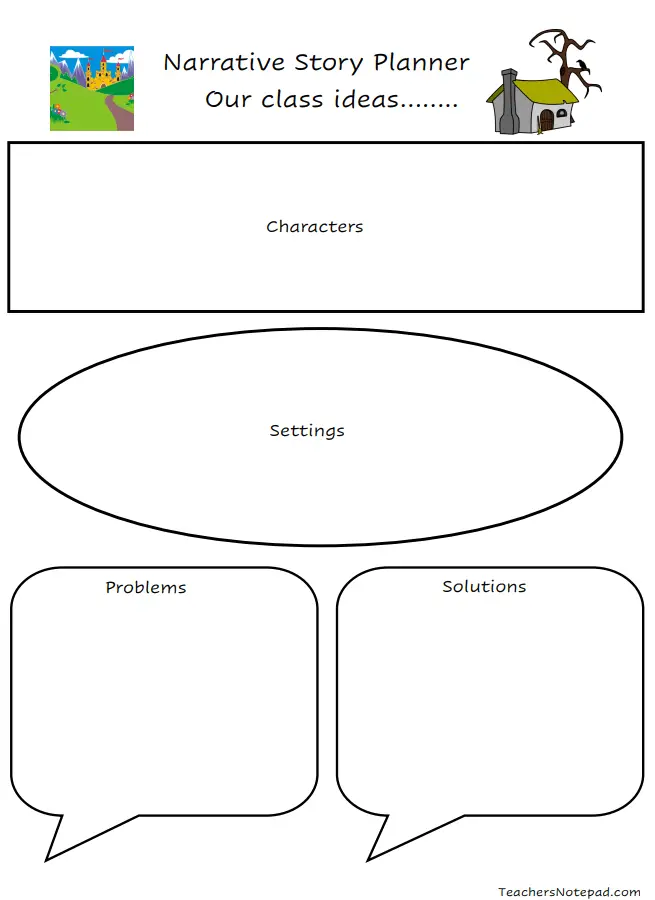
While teaching younger children, one method I’ve used with great success is to enlarge the class narrative planner and either print or otherwise display this to the class.
I’ll then take the class through an example.
We will discuss what a narrative is, and I’ll ask the children for examples relating to fairy tales that they (and the rest of the class) are familiar with.
We’d usually choose one and read it as a class, then go through the worksheet to break out the different elements.

For example – Class brainstorm:
We might select the ubiquitous childhood classic Little Red Riding Hood.
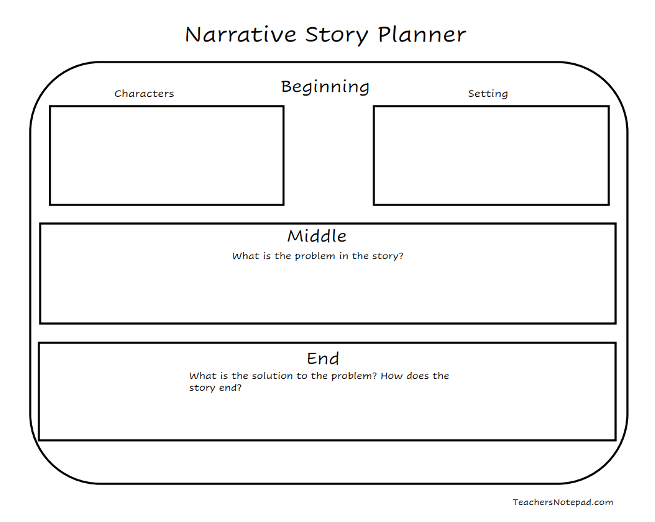
First, I’ll introduce the parts of the narrative:
- Characters
- Setting
- Problem
- Solution
To make it extra engaging I will often print out and laminate the characters from the story…
- Wolf
- Little Red Riding Hood
- Grandma
Then do the same for some of the settings…
- The Woods
- Grandma’s House
And even some of the problems and solutions…
- Wolf in Grandma’s bed
- Wolf in pot
We’ll then put these up under the relevant heading within the story planner.
This helps the children understand the concept of the various features of a narrative.
We’ll complete our fairy tale narrative sheet brainstorm – usually many good class discussions come out of this process.
I write down the classes answers as to who are the characters, and what are the settings, problems and solutions from several popular fairy tales (for example: Snow White, Hansel and Gretel, Shrek etc).
This helps the children begin identifying the different narrative elements on their own.
I’ll then direct the students to “think-pair-share” with a buddy, sharing their ideas for their story – before giving them their own narrative planner to begin.
Time for the students to start their own plan
When it comes time for the children to get started with their own story planning, I’ll get them drawing and writing notes for the characters, settings, problems and solutions they would like in their story.
I’ll usually set guidelines for this, such as 4 characters, 2 settings, and 1 problem/solution for their narrative – which will help keep them focused.
It can be helpful to write some examples and put them up for display to the class:
- Characters: e.g. man, girl, dog, horse…
- Settings: e.g. river, forest, house, school…
- and you could do the same for problems/solutions.
It can often be a good idea to send the students off to begin their own thinking and story planning at this stage.
We will later regroup and ask the children to share what ideas they’ve come up with so far – which certainly gets the cross pollination of story ideas happening.
Regroup as a class
Once all narrative plans are completed, we’ll go back to the plan which we completed as a class and beginning with their own characters and settings, start to craft the ideas into sentences and paragraphs – scaffolding the process for the children so they know how to begin using their ideas.
The children can tick off on their plan each idea/character etc as they go to help keep track of it.
Here are the PDFs:
More teaching resources
We hope you find these useful in your own teaching.
If you’d like more downloadable templates and other goodies that help make teaching easier and effective, you’re in luck!
Check out our free resources and teaching tools 🙂
Thanks,
– Matt & Hayley